.webp?unique=5491803)

.webp?unique=5491803)

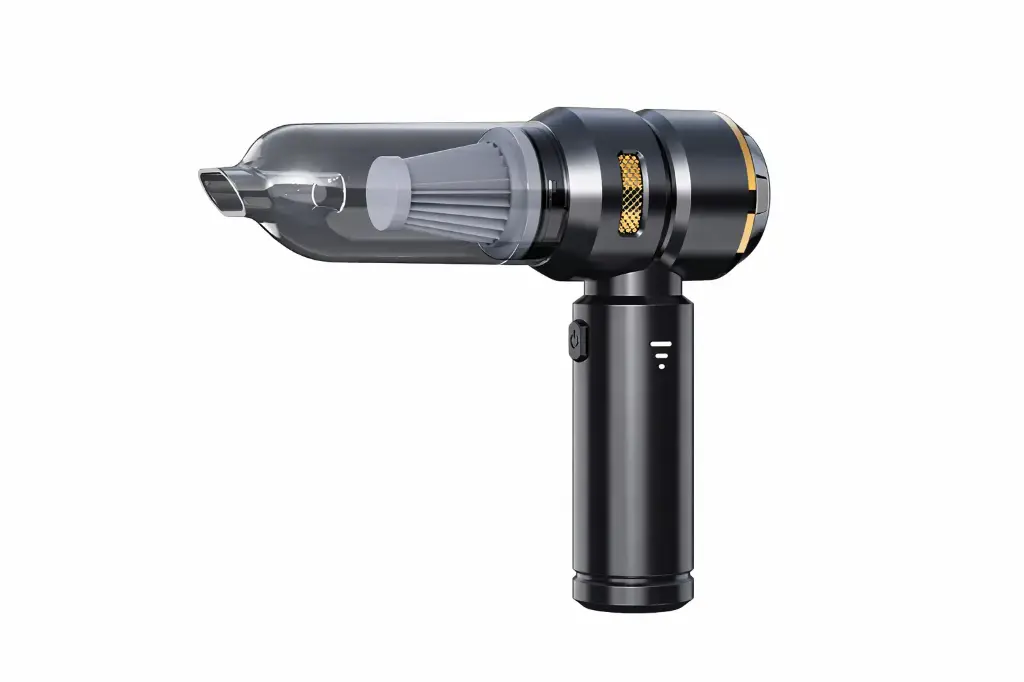
Brushless Vacuum Cleaner SW-121
The SW-121 handheld vacuum cleaner is practical for quick cleaning around the house and car. Its compact size makes it easy to carry with one hand. It helps remove dust, crumbs, and hair from seats and tight corners thanks to its crevice nozzle, and features a removable and washable filter for consistent performance. Its design is convenient for everyday use, and the dustbin empties quickly in seconds.
Technical specification:
Power: Typically 60–120 W
Suction Power: Typically 4,000–9,000 Pa
Battery: Typically 2,000–4,000 mAh (Lithium)
Running Time: Approximately 15–30 minutes, depending on the mode
Charging Time: Approximately 2.5–4 hours
Charging Input: Typically USB 5V (Type-C or Micro-USB, depending on the model)
Dust Container Capacity: Approximately 0.2–0.6 L
Filter: Washable (Mesh/HEPA, depending on the batch)
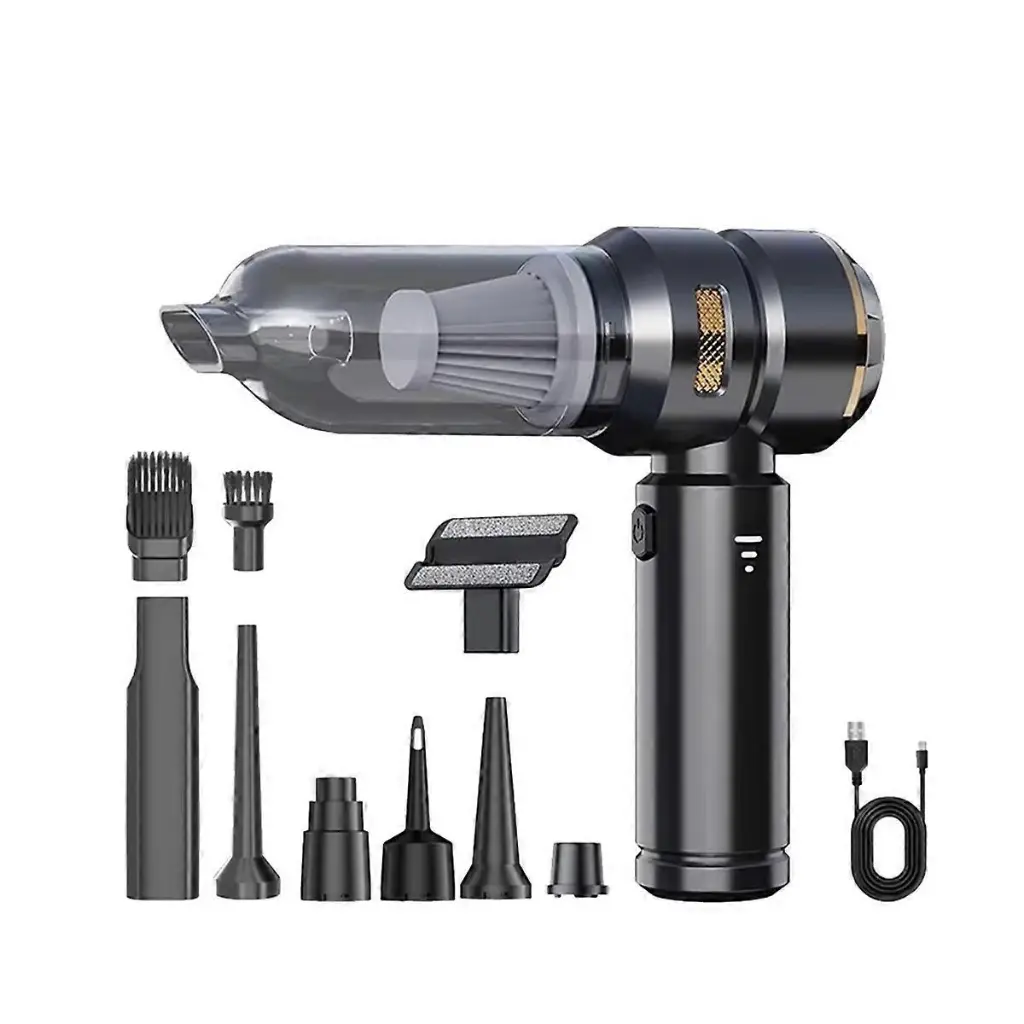
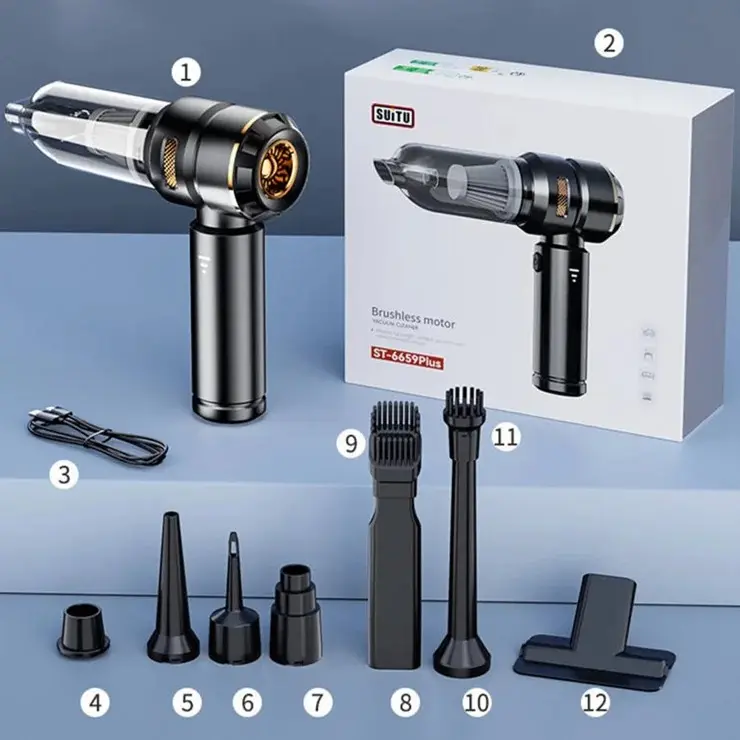
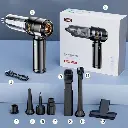
Common Accessories: Crevice Nozzle + Brush
How to use:
1. Charging and Setup
Charging: Before first use, make sure the vacuum cleaner is fully charged using the charging cable included (usually with a Type-C port on the back or bottom).
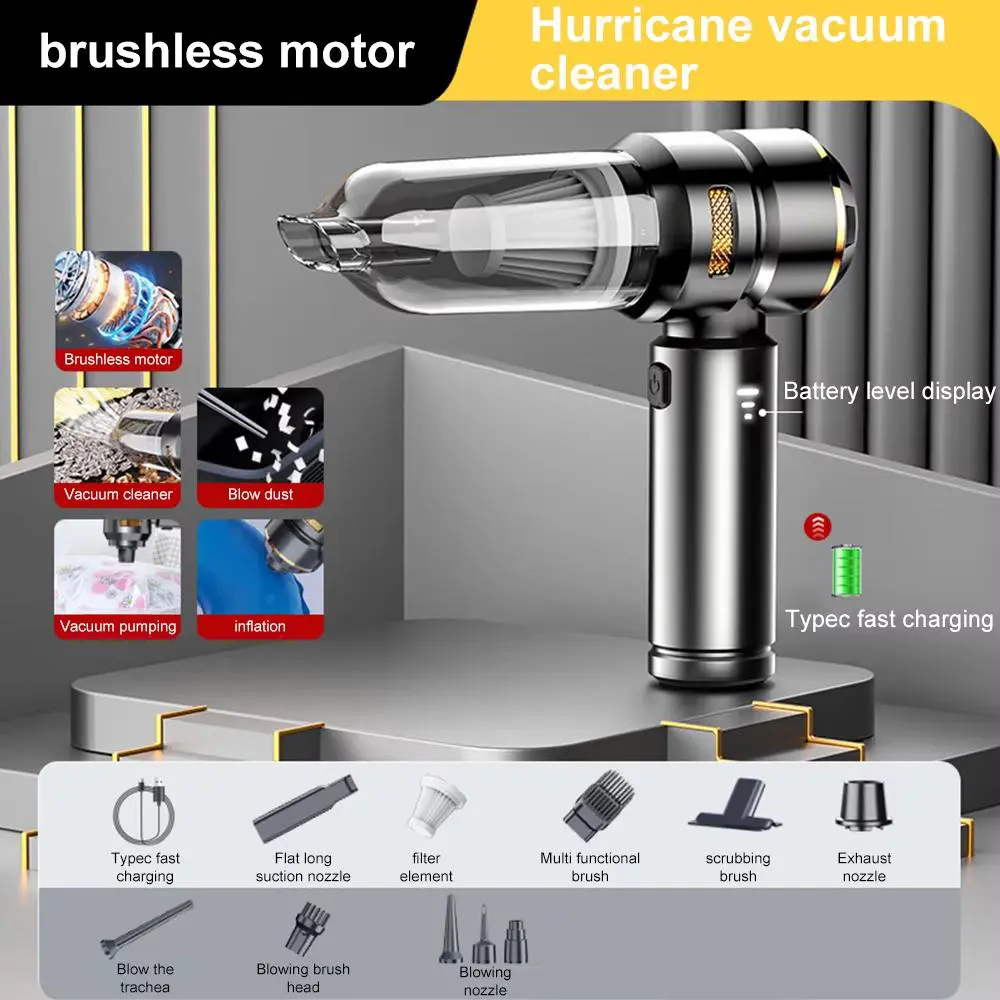
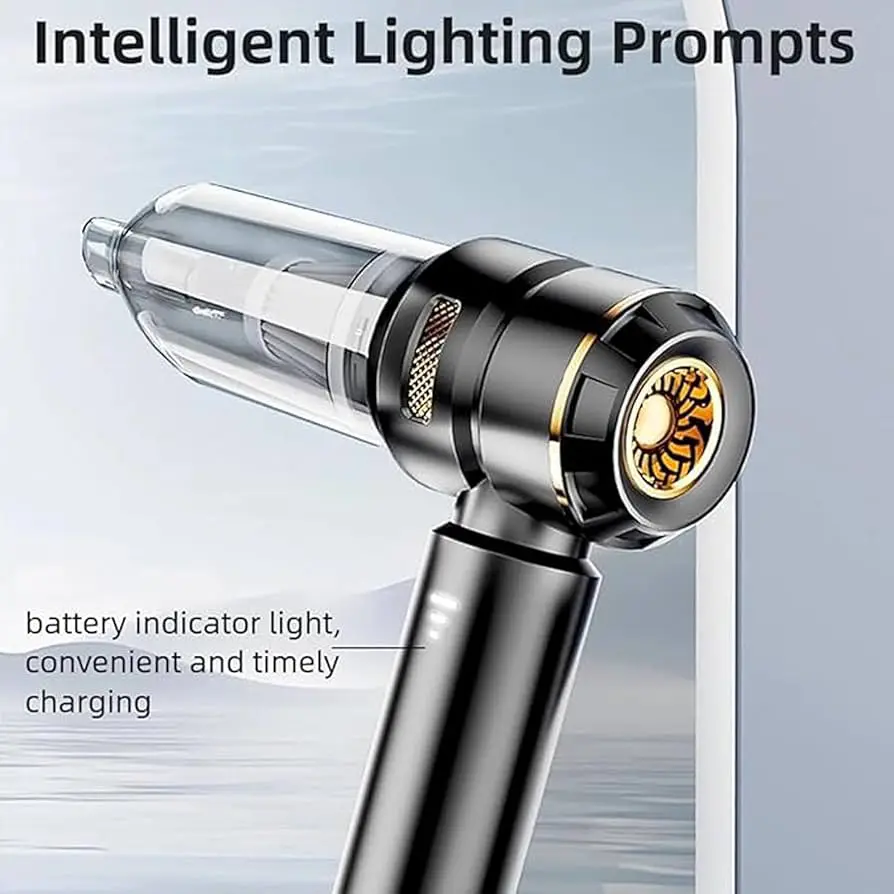
Battery Indicator: You will notice small indicator lights (3 dots) below the power button. These dots indicate the battery charge level. When fully lit, the device is fully charged and ready for use at full power.
2. Operation
Power Button: Hold the vacuum cleaner by the handle and press the clearly visible power button to start the suction motor.
Speed Control: Most brushless vacuums have two speeds. Press once for normal speed (for light cleaning and dusting), and press again to switch to maximum speed (for picking up crumbs and heavier dirt). A third press stops the device.
Cleaning: Point the front nozzle towards the surfaces you want to clean (such as car seats, computer keyboards, or furniture corners). Note: This device often comes with additional attachments (such as a brush or a long, thin nozzle) that you can attach to the front to reach very tight spaces.
3. Emptying and Cleaning (To Maintain Suction Power)
Tank Monitoring: Thanks to the transparent front panel, you can easily see the dust and dirt level and know when it's time to empty it.
Disassemble and Empty: Hold the device, gently twist the transparent front panel (usually with a simple turn to open) and pull it off to detach it from the black main motor housing.
Cleaning the Filter (Ribbed Inner Part):
Pull the filter out from inside the transparent part.
Empty the dirt from the tank into the dustbin.
Gently shake the filter to remove any dust trapped in its crevices.
Important: If you wash the transparent tank or filter with water, you must allow them to air dry completely before reattaching them to the vacuum cleaner; any moisture entering the motor can damage it.
4. Closing and Reassembling
After ensuring that the filter and tank are clean and dry, return the filter to its place, then install the transparent part into the main body and twist it to close it tightly.
Technical specification:
Power: Typically 60–120 W
Suction Power: Typically 4,000–9,000 Pa
Battery: Typically 2,000–4,000 mAh (Lithium)
Running Time: Approximately 15–30 minutes, depending on the mode
Charging Time: Approximately 2.5–4 hours
Charging Input: Typically USB 5V (Type-C or Micro-USB, depending on the model)
Dust Container Capacity: Approximately 0.2–0.6 L
Filter: Washable (Mesh/HEPA, depending on the batch)
Common Accessories: Crevice Nozzle + Brush
How to use:
1. Charging and Setup
Charging: Before first use, make sure the vacuum cleaner is fully charged using the charging cable included (usually with a Type-C port on the back or bottom).
Battery Indicator: You will notice small indicator lights (3 dots) below the power button. These dots indicate the battery charge level. When fully lit, the device is fully charged and ready for use at full power.
2. Operation
Power Button: Hold the vacuum cleaner by the handle and press the clearly visible power button to start the suction motor.
Speed Control: Most brushless vacuums have two speeds. Press once for normal speed (for light cleaning and dusting), and press again to switch to maximum speed (for picking up crumbs and heavier dirt). A third press stops the device.
Cleaning: Point the front nozzle towards the surfaces you want to clean (such as car seats, computer keyboards, or furniture corners). Note: This device often comes with additional attachments (such as a brush or a long, thin nozzle) that you can attach to the front to reach very tight spaces.
3. Emptying and Cleaning (To Maintain Suction Power)
Tank Monitoring: Thanks to the transparent front panel, you can easily see the dust and dirt level and know when it's time to empty it.
Disassemble and Empty: Hold the device, gently twist the transparent front panel (usually with a simple turn to open) and pull it off to detach it from the black main motor housing.
Cleaning the Filter (Ribbed Inner Part):
Pull the filter out from inside the transparent part.
Empty the dirt from the tank into the dustbin.
Gently shake the filter to remove any dust trapped in its crevices.
Important: If you wash the transparent tank or filter with water, you must allow them to air dry completely before reattaching them to the vacuum cleaner; any moisture entering the motor can damage it.
4. Closing and Reassembling
After ensuring that the filter and tank are clean and dry, return the filter to its place, then install the transparent part into the main body and twist it to close it tightly.
| BENEFIT: Products that guarantee saving you time and your daily comfort |
Your Dynamic Snippet will be displayed here...
This message is displayed because youy did not provide both a filter and a template to use.